Chalk Paint Furniture Ideas for Beginners: Easy First Projects
Some links in our guides may earn us a commission at no extra cost to you — here's why we only recommend what we'd buy.
Jump to a section
Chalk paint is the reason so many people discover furniture makeovers: it sticks to almost anything, needs barely any prep, and forgives a shaky brush hand. If you have a tired dresser, a scratched side table, or a thrift-store find waiting for a second life, this guide gives you the best beginner projects, an honest difficulty rating, a shopping list, and the ventilation and waxing tips that separate a finish that lasts from one that flakes.
Why Chalk Paint Is Perfect for Beginners
Difficulty: 1–2 out of 5 — beginner. Chalk paint (a thick, matte, water-based paint made for furniture) adheres to wood, laminate, and even metal with minimal sanding — usually none at all, just a good cleaning. That removes the most intimidating part of furniture painting. The learning curve is in the technique: thin coats, light brush pressure, and knowing when to wax. A first project takes about 3–5 hours including drying time, which makes it a genuine one-weekend win.
Tip: chalk-style paint is now sold by many brands at hardware stores, craft stores, and big-box retailers — you do not need the most expensive brand to get good results.
The Easiest First Chalk Paint Projects
Not all furniture is equal for a first attempt. Start with one of these, ranked from easiest up:
- A wooden side table or nightstand. Small, simple shapes, no drawers to fuss with. The perfect first project — one can of paint covers it easily.
- A picture frame or mirror. Almost instant results. Paint, distress lightly, wax, done. Great for testing a color before committing to furniture.
- A wooden chair. Slightly more surface area but still simple geometry. Painted chairs in a bold color make fantastic dining-room accents.
- A small bookshelf or storage crate. Straight lines and flat surfaces — forgiving to paint and very satisfying when finished.
- A dresser (your second or third project). Drawers add work: remove the hardware, paint drawer fronts separately, and be patient with the drying between coats. Save this until you have one small win under your belt.
What to Buy: Materials and Tools
- Chalk-style paint: one quart ($18–$30) covers a small dresser or two side tables. Start with a versatile color: warm white, soft gray, sage green, or dusty blue.
- Clear furniture wax: the standard sealant for chalk paint ($15–$20 for a small tin). This protects the finish — skipping it is the number-one reason beginner pieces chip.
- Wax brush or soft cloth: a round wax brush makes application easier, but an old t-shirt works fine for your first project.
- Brushes: a 2-inch flat synthetic brush for flat areas and a 1-inch brush for detail. Cheap chip brushes work well with chalk paint.
- Sandpaper: 150-grit for any glossy spots or rough areas; 220-grit for light distressing between coats (optional).
- Cleaner: a degreasing cleaner or simple dish-soap-and-water wash to remove grime, especially on kitchen or thrifted pieces.
- Painter's tape and drop cloths to protect floors and hardware you are not removing.
Budget for a first small project: about $40–$60, and the leftover paint and wax carry over to the next one.
Ventilation and Safety Notes
Chalk paint is low-VOC and water-based, which makes it one of the safest furniture paints — but "safer" does not mean you can ignore basics:
- Work in a ventilated space. A garage with the door open, a covered porch, or a room with windows open and a fan running. Low odor is not the same as no fumes.
- Wear a dust mask when sanding. Even light sanding creates fine dust, and old furniture may have old finishes or unknown paint underneath.
- Check old pieces for lead paint. Furniture painted before 1978 may contain lead. Use an inexpensive lead test kit from the hardware store before sanding any vintage piece. If it tests positive, do not sand it — consult local guidance for safe handling.
- Keep wax and paint away from children and pets during the project, and store cans sealed and upright.
Step-by-Step: Your First Chalk Paint Project
Step 1 — Clean thoroughly. Wash the piece with degreasing cleaner and let it dry completely. Grease and grime are the main reason chalk paint peels.
Step 2 — Scuff only where needed. Chalk paint needs minimal prep, but glossy laminate or lacquer benefits from a quick once-over with 150-grit sandpaper. You are not stripping the finish — just giving it tooth.
Step 3 — Paint thin coats. Load the brush lightly and use long, even strokes. Two thin coats always beat one thick coat. Let the first coat dry fully (usually 1–2 hours) before the second.
Step 4 — Distress lightly (optional). If you want the vintage look, rub edges and corners gently with 220-grit sandpaper to let a hint of wood show through. Less is more — you can always distress more, but you cannot un-distress.
Step 5 — Wax to seal. Apply clear furniture wax in a thin layer with a brush or cloth, working it into the paint in circular motions. Wipe off any excess. Let it cure for 24 hours before heavy use — the wax hardens over a few weeks, and the finish gets tougher over time.
Tip: wax a little at a time. A thick glob of wax stays tacky and attracts dust; two thin layers beat one heavy one.
5 Beginner Mistakes That Ruin Chalk Paint Finishes
- Skipping the cleaning step. Paint over kitchen grease or furniture polish and it will peel within weeks, no matter how good the paint is.
- Brushing too thick. Chalk paint dries fast. Thick coats leave brush marks and can crack. Thin, confident strokes are the whole technique.
- Skipping the wax. Unwaxed chalk paint is porous and stains easily — one coffee ring can mark a side table permanently. Always seal it.
- Using the piece too soon. Paint feels dry in hours, but the wax needs about a day to set and weeks to fully cure. Be gentle with the piece at first.
- Painting in direct heat or sun. Hot, sunny conditions make chalk paint dry before it levels, leaving a rough texture. Work in the shade or indoors.
Final Thought
Chalk paint's reputation as a beginner miracle is mostly deserved: low prep, forgiving application, and a matte finish that looks intentional even on a first try. The three things that decide your result are cleaning, thin coats, and wax. Get those right, and that tired side table becomes the piece everyone asks about.
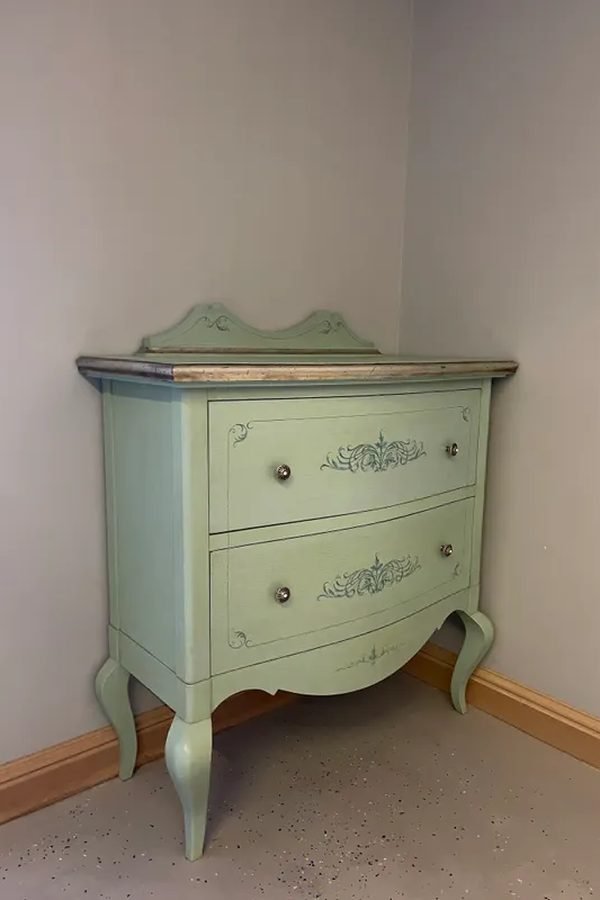
When your first project is done, the same skills open up more creative options: two-tone dressers (painted body, stained wood top), stenciled drawer fronts, color-washed finishes (thin, watery coats that let wood grain show), and dark wax over light paint for an aged, antiqued look. Thrift stores, flea markets, and curbside finds on trash day are a chalk painter's best supply chain — solid wood pieces that look dated are usually the best quality furniture you can get for the price.