DIY Candle Holders and Table Centerpieces for Cozy Gatherings
Some links in our guides may earn us a commission at no extra cost to you — here's why we only recommend what we'd buy.
Jump to a section
Nothing makes a gathering feel special faster than candlelight — and you do not need expensive decor to get it. With jars from the recycling bin, a few dollar-store candles, and some greenery, you can build DIY candle holders and table centerpieces that look thoughtful and intentional. This guide gives you 8 beginner projects, real costs, the candle safety rules that actually matter, and simple styling formulas that work on any table, for any season.
Why Candlelight Works (and Costs Almost Nothing)
Difficulty: 1 out of 5 — the easiest project on this site. Most of these projects are assembly, not crafting: clean a jar, add a candle, arrange around it. Each project takes 20–60 minutes, and many cost under $5 if you shop your recycling bin first. The skill here is styling — learning the simple formulas below that make a few candles look like a designed centerpiece instead of a cluttered table.
Tip: candlelight flatters everything. Dim the overhead lights and let candles do the work — it is the cheapest atmosphere upgrade in home decor.
8 DIY Candle Holder Ideas
- Mason jar lanterns. Clean glass jars + tea lights or votives. Tie twine around the rim for a rustic look, or paint the outside with frosted-glass spray for a soft glow. Cost: nearly free.
- Wrapped pillar holders. Wrap a glass cylinder or jar with burlap, lace, or kraft paper, secured with a dab of hot glue. The light shining through the texture is the whole effect.
- Wine glass candle domes. Turn a wine glass upside down over a tea light — the glass magnifies the flame. Add small pinecones, ornaments, or flowers underneath for seasonal versions.
- Wood slice bases. Set pillar candles on flat wood slices (sold at craft stores for a few dollars). Instant rustic centerpiece, zero crafting skill needed.
- Tin can lanterns. Fill a clean tin can with water, freeze it, then punch a pattern of holes with a hammer and nail. The ice keeps the can from denting. Drop in a tea light for patterned light.
- Concrete-look holders. Small concrete or cement-look votive holders from the dollar store look far more expensive than they are. Group three in different heights.
- Herb bundle wraps. Tie dried lavender, rosemary, or eucalyptus sprigs around a plain pillar candle with twine. Beautiful and fragrant — keep the herbs well above the flame.
- Mirrored tray clusters. A thrifted mirror or tray with candles of different heights grouped on it. The mirror doubles the candlelight and makes any arrangement look deliberate.
Styling Formulas for Table Centerpieces
A centerpiece is just an arrangement with rules. Use these formulas and you cannot go wrong:
- The rule of three: group candles in odd numbers — three or five holders of varying heights. Odd groupings look natural; even ones look stiff.
- Vary the heights. Mix tall tapers, medium pillars, and low tea lights. Flat arrangements disappear on a table; height variation creates depth.
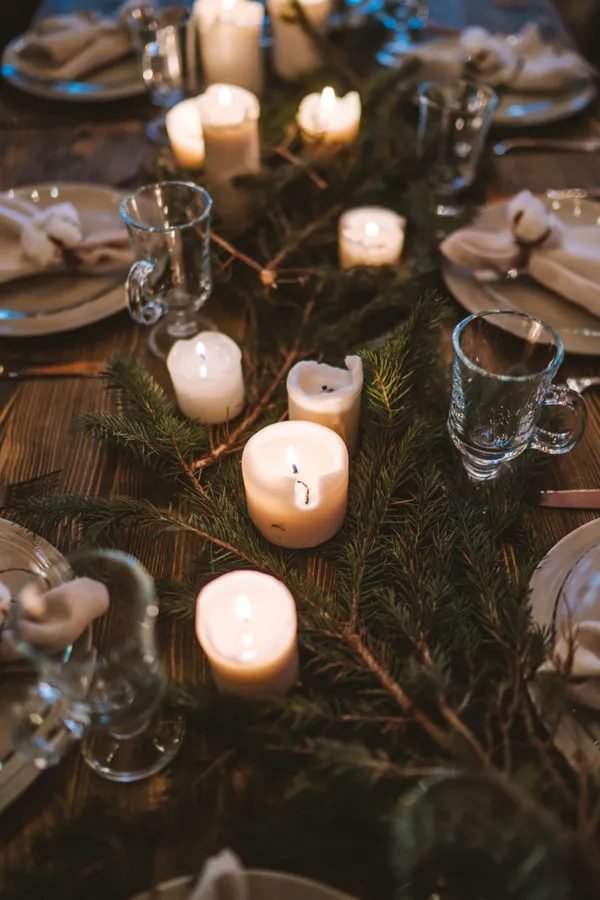
- Add one natural element. Greenery, pinecones, dried flowers, fruit, or stones. One natural element per arrangement keeps it from looking like a candle store display.
- Use a tray or runner as a base. A tray, a wood board, or even a folded table runner defines the centerpiece zone and makes the whole table look styled.
- Keep sight lines open. For dining tables, keep the tallest element below eye level (about 12 inches) so guests can see each other across the table.
- Match the season, not the holiday. Greenery and wood work in October and February. You do not need themed decor — seasonal textures are enough.
Candle Safety: The Non-Negotiable Rules
Homemade candle holders are wonderful, but fire safety comes first — especially with DIY materials:
- Never leave burning candles unattended. This is the rule all other rules serve. Blow them out when you leave the room.
- Keep flames away from flammable materials. Dried flowers, paper wraps, fabric, and herb bundles look beautiful near candles, not touching them. Keep at least a few inches of clearance, and never let a flame lick wrapping material.
- Use stable, heat-resistant bases. Glass, metal, ceramic, and stone are safe. Avoid thin plastic, and make sure every holder sits flat without wobbling.
- Trim wicks to 1/4 inch before lighting. Long wicks make tall, smoky flames that can scorch holders and nearby decor.
- Do not burn a candle all the way down. Stop with about half an inch of wax left, especially in glass jars — overheated glass can crack.
- Keep candles away from drafts, kids, and pets. Place centerpieces where they cannot be knocked over, and never on a wobbly or crowded table edge.
- Consider flameless candles for arrangements with lots of dried material, or when kids and pets will be near the table. Modern LED candles flicker convincingly and remove the risk entirely.
Real Costs: What Each Centerpiece Actually Runs
- Mason jar cluster (5 jars): $0 for jars from home, $5 for a bag of tea lights. Total: ~$5.
- Wine glass domes (3): $3–$6 for thrifted glasses, $3 for tea lights. Total: ~$8.
- Pillar + wood slice + greenery: $4 wood slice, $3 pillar candle, greenery free from the yard. Total: ~$7.
- Tin can lanterns (4): free cans, $4 tea lights. Total: ~$4.
- Mirrored tray grouping: $3–$5 thrifted tray, $8–$12 for mixed candles. Total: ~$12–$17.
Compare that to $25–$60 for a single store-bought centerpiece, and the DIY case makes itself.
Tip: buy candles at dollar stores, warehouse clubs, and post-holiday clearance sales. Candle quality matters less than you think — the holder and the styling do the visual work.
Adapting Centerpieces Through the Seasons
The candle holders stay the same; only the styling changes:
- Fall: add small pumpkins, pinecones, and eucalyptus around the candle cluster.
- Winter holidays: evergreen sprigs, cranberries in a glass bowl, and metallic accents.
- Spring: fresh flowers in a small jar, pastel candles, light greenery.
- Summer: citrus slices, sand and shells in clear jars, white candles.
Build one good set of holders and re-style them four times a year. That is the whole strategy.
Final Thought
DIY candle holders and table centerpieces are the highest-impact, lowest-effort project in home decor: a few dollars, under an hour, and a table that feels like an occasion. Respect the safety rules, use the styling formulas, and re-style the same pieces with the seasons. Cozy is a skill — and this one is easy to learn.