DIY Floating Shelves for Beginners: Build Them in a Weekend
Some links in our guides may earn us a commission at no extra cost to you — here's why we only recommend what we'd buy.
Jump to a section
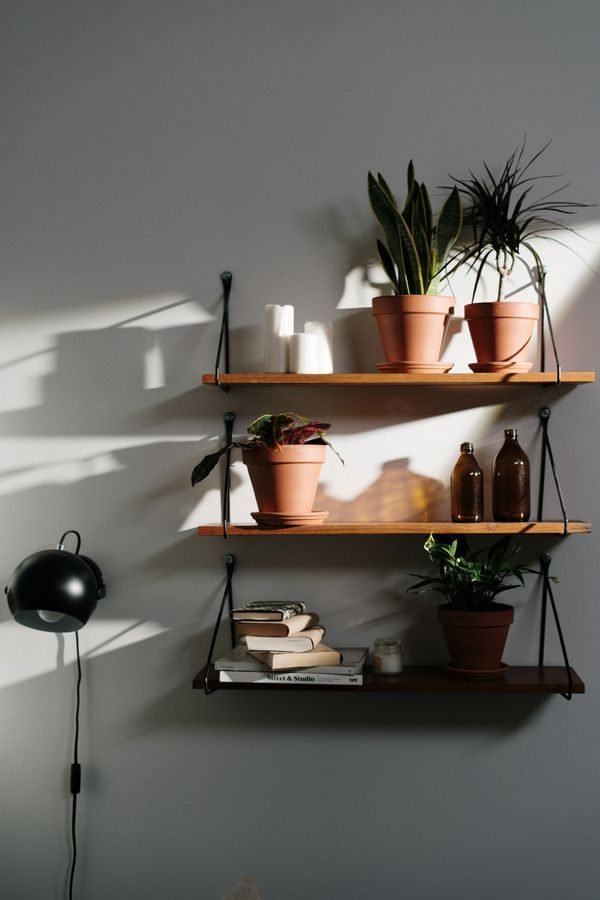
Floating shelves look like something only a skilled carpenter can pull off — but they are one of the most beginner-friendly woodworking projects there is. This guide walks you through building and mounting sturdy floating shelves over a single weekend, with an honest look at the difficulty, a complete materials list, and the safety details (wall anchors, studs, weight limits) that actually matter. If you can operate a drill, you can do this.
How Hard Is This Project, Honestly?
Difficulty: 2 out of 5 — beginner. The woodworking is minimal: you are cutting straight lines and drilling holes. The real skill in this project is measuring and mounting. The two things that trip up beginners are (1) not finding the wall studs, and (2) rushing the leveling. Take your time on those two steps and the rest is straightforward. Plan for about 4–6 hours total across two days — day one for cutting and finishing the wood, day two for mounting after the finish dries.
Tip: this is a great first power-tool project because every cut is a simple straight line. There are no angles, no joints, and no joinery to learn.
Materials and Tools You Will Need
For two shelves, each about 36 inches long and 8 inches deep (a classic living-room size):
- Wood: one 8-foot 1x8 pine board (about $12–$18 at a hardware store) — or two pre-cut 36" shelf boards. Ask the store to cut it for you; most home-improvement stores make a few cuts free.
- Hidden bracket: one floating shelf bracket kit rated for at least 30 lbs per shelf ($15–$25 online or in-store). Look for the solid-rod style, not the thin L-bracket style.
- Wall fasteners: wood screws for studs, plus heavy-duty drywall anchors (toggle bolts, rated 50+ lbs each) for any spot without a stud.
- Drill and bits: a basic cordless drill, a spade bit matching your bracket rod diameter, and a standard twist bit for pilot holes.
- Level: a 2-foot level is ideal; a long straight board and a phone level app works in a pinch.
- Stud finder: $10–$15 at any hardware store, and worth every cent.
- Sandpaper: 120-grit and 220-grit.
- Finish: stain or paint of your choice, plus a clear sealer. Sample pots of paint cost under $10 and cover two shelves easily.
- Extras: painter's tape, a pencil, measuring tape, safety glasses, and a dust mask.
Total cost per pair of shelves: roughly $40–$60, versus $60–$100+ per shelf for store-bought versions.
Safety First: Walls, Anchors, and Weight
A shelf that falls off the wall is dangerous, so read this section twice:
- Always mount into studs when possible. A stud is the wooden beam behind your drywall. Screws driven into a stud hold hundreds of pounds. A stud finder locates them; mark both edges of the stud, since the center is the strongest point.
- Use real anchors for drywall-only spots. If one end of the shelf lands between studs, use toggle bolts or snap-toggle anchors rated for at least 50 lbs each — never plain plastic screw anchors, and never just a screw into drywall.
- Respect the bracket rating. Your bracket kit lists a maximum load. Stay well under it, and remember that heavy books add up fast: 36 inches of hardcovers can weigh 30–40 lbs.
- Keep heavy items near the wall. Floating shelves are strongest at the wall bracket. Place heavy books toward the back of the shelf and lighter decor toward the front.
- Wear safety glasses and a dust mask when cutting and sanding wood. Drilling overhead means dust falls in your face — glasses are not optional here.
Step-by-Step: Build and Mount Your Shelves
Step 1: Choose Your Spot and Find the Studs (30 Minutes)
Decide where the shelves will live: above a desk, over a sofa, or in a hallway. Mark your planned shelf positions lightly in pencil. Then run the stud finder slowly across the wall and mark every stud with painter's tape. Standard walls have studs every 16 inches, so a 36-inch shelf will usually cross at least two. Adjust your shelf length or position so the bracket screws hit at least one stud, ideally two.
Step 2: Cut and Sand the Wood (1 Hour)
Measure twice, mark with a pencil, and cut your board into two equal pieces with a handsaw, circular saw, or the store's free cuts. Then sand each board: start with 120-grit to remove rough spots and splinters, then finish with 220-grit for a smooth surface. Sand with the grain, and wipe the dust off with a damp cloth before finishing. Rounded or chamfered edges look more finished — you can soften the front edge just by sanding it a little more aggressively.
Step 3: Finish the Boards (1–2 Hours Plus Drying Time)
Stain or paint your shelves the way you want them to look on the wall. For stain: apply thin, wipe off the excess, and let it dry fully before adding a clear sealer. For paint: one coat of primer plus two thin top coats gives a durable finish. Let everything dry overnight if you can — mounting a tacky shelf is miserable. This is the step where the project "looks" professional: a clean finish hides every beginner imperfection underneath.
Tip: finish the boards before mounting them. It is far easier to stain a board lying flat on a table than one stuck to a wall.
Step 4: Mark, Drill, and Mount the Bracket (1–2 Hours)
Hold your finished shelf up at the desired height and mark the bracket position on the wall in pencil. Use the level obsessively here — draw a full level line along the wall where the shelf will sit. Drill pilot holes at your marks: into studs for the stud screws, or properly sized holes for your toggle anchors. Secure the bracket plate to the wall, check that it is level and tight, then slide the shelf onto the bracket rods. Most kits include small set screws under the shelf that lock it onto the rods — tighten them so the shelf cannot slide off.
Step 5: Load It Up (15 Minutes)
Step back and check the shelf from across the room. Small adjustments now save annoyance later — if it is off by a fraction, loosen the set screws, nudge, and retighten. Style it with the heavy books near the wall and lighter items forward. A good starter formula: a stack of books on one end, a small plant in the middle, and a framed photo or piece of art on the other end.
Beginner Mistakes to Avoid
- Skipping the stud finder. Guessing where studs are is how shelves end up on the floor. The $12 tool prevents the $60 do-over.
- Using cheap plastic anchors for a loaded shelf. They pull out of drywall under sustained weight. Toggle bolts or nothing for drywall-only mounting.
- Mounting without a level line. A shelf that is even slightly crooked becomes the only thing you see in the room.
- Overloading the first shelf. Start conservative. You can always add more items; you cannot un-sag a board.
- Drilling into the wall without checking for wires and pipes. If you are drilling into a wall near outlets, light switches, or plumbing, use a stud finder with a wire-warning feature, or choose a different spot.
Final Thought
DIY floating shelves earn their reputation as a perfect beginner project: simple cuts, simple hardware, and a huge visual payoff. Take stud-finding and leveling seriously, respect the weight limits, and you will end up with shelves that look custom-built — because they are. Your next project just got a lot less intimidating.